

Kusudama are three-dimensional figures assembled from a large number of paper modules. This art movement originated in ancient Japan, when kusudama balls were used to mix dry herbs and incense. Today, these balls are popular among designers and handmakers who use kusadami to decorate interiors..
Also read: Kusudama Technique for Beginners Step by Step
Simple kusudami schemes for beginners
It is believed that kusudama is a kind of origami, although in reality this is not entirely true. A distinctive feature of true origami is that no glue is used when folding the paper. But the modules with kusads will have to be glued together to get a three-dimensional figure.
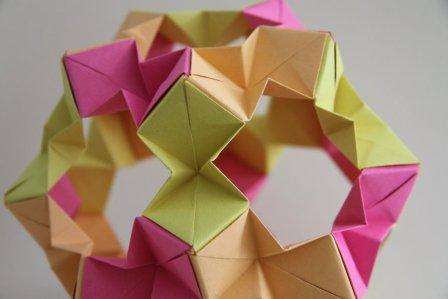 Photo of the assembly by kusudami
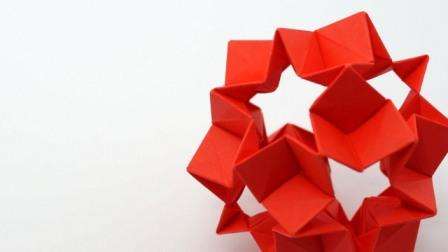
One of the simplest types of kusads is called Cookiecutter, which means “cookie cutters”. Its elements resemble iron forms, which were used to squeeze out the figures on the dough. In order to make a similar shape, you need to prepare 30 identical squares of paper measuring 7 * 7 cm. Give preference to thick paper so that the shape holds well. Start making from simple modules, which are then connected to each other.
How to assemble a kusadama flower, see the assembly diagram for beginners:
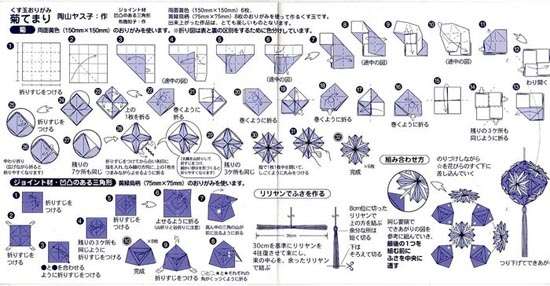 Kusudami assembly diagram
Begin to fold each square twice diagonally to form the fold lines and center. After that, bend the two extreme opposite corners to the center, and then, without unbending them, fold the two sides to the middle.
 Simple kusadam diagram
You need to bend the side corners and you will end up with a rectangle from a square. Fold the lower right corner up, bending so that it turns out to be the side of the parallelogram.
Assembling the Cookiecutter step by step in the diagram:
Bend the upper left corner down. As a result, you will have a full-fledged parallelogram. Now you need to hide the corners with the pencil inward.
After that, the module is turned over, folded in half and diagonally. A double triangle should form inside the module. It remains to bend the corners on both sides up and the module is ready. From all the squares, you need to make such modules, and then collect them into a Cookiecutter kusudama ball.
Watch the video: Master class by Kusudami Cookiecutter
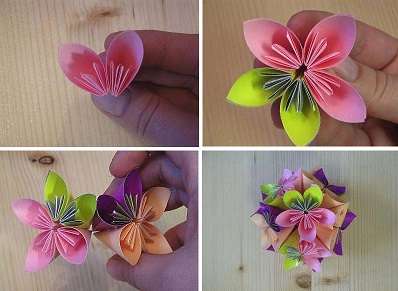
Master class with a photo: a ball with kusudama flowers
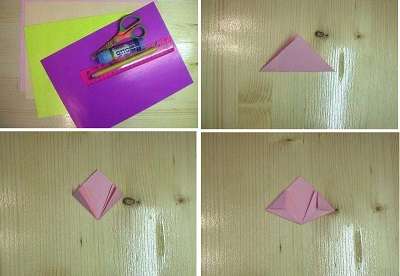
An original and bright paper decoration can be made not only by an adult, but even by a child. You need to prepare the following materials:
- Colored paper
- PVA glue
- Scissors
- Ruler
 Cookiecutter assembly diagram
One ball will consist of 12 ready-made flowers, each of which is assembled from small modules. Cut the colored paper into 7 by 7 cm squares. Since you need to use five squares for one flower, you will need all 60 squares. You can make them in different colors or combine 2-3 colors.
 Kusudami assembly diagram
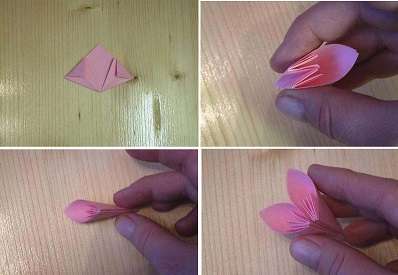
Each square is folded diagonally twice to create clear lines and a center. Fold the square with a triangle diagonally, and then fold the edges towards the center so that you get a rhombus.
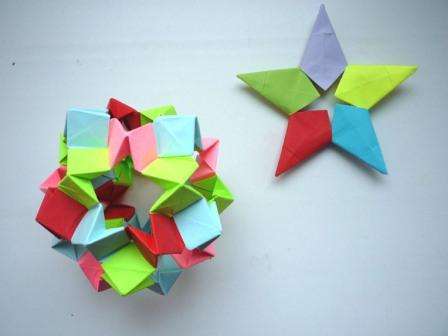
Now you need to unfold the corners and bend each of them inward. As a result, the triangles will decrease and you will get a figure as in the photo. It consists of three leaves, so it can be called a shamrock..
Fold the corners of the resulting shamrock, and then fold the module so that the triangles are inside. Press down only the edges so that the shape turns out to be three-dimensional. You have one module for making a kusudama flower for beginners ready.
When you have made several of these modules, you can assemble a flower from five. Connect the modules together with glue so that they hold well.
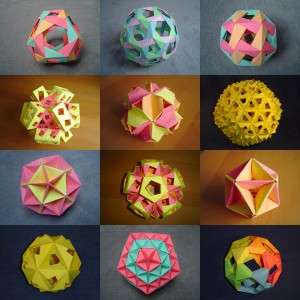 Photo of balls by kusudami
Interesting article: How to make a kusadama flower
Make 12 flowers, and then start assembling the kusudama ball from the beginner flowers. You can put a thread in the middle of the ball so that the finished craft can be hung.
As you can see, schemes for assembling kusudama balls simple enough for beginners, so you can make original shapes with your own hands. Learn new techniques in the art of paperwork and make beautiful crafts for a gift or to decorate the interior of a school, kindergarten or home. Kusudami is not just art, because with it you can unleash your creativity. Working with small modules has a positive effect on hand motor skills, so try making kusudama balls with your children..