

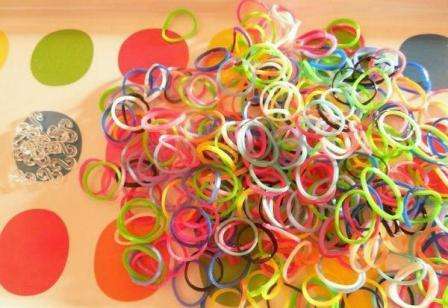
A bracelet is a piece of jewelry worn by almost all people, regardless of gender or age. A beautiful ring on the hand will add zest to any look, so it has been popular since ancient times. Today there are new materials for making jewelry – Rainbow Loom Bands rubber bands. Now bracelets can be made not only by experienced craftsmen, but also by schoolchildren. In this article, you will learn 5 ways to make rubber bracelets.
History of bracelets
Everyone knows that such jewelry as rings, earrings, necklaces appeared in antiquity, at the same time the first bracelets were made. In ancient times, people were very superstitious, so all jewelry had a magical meaning. Bracelets sometimes could indicate that a person belongs to a certain tribe, religion, or has a certain position or status in his society.
Much time has passed and today the attitude of people towards bracelets has changed significantly. Now they are a common decoration that allows a person to stand out from the crowd and distinguish themselves with their personality. Modern craftsmen have learned how to make bracelets from different materials and turn them into real works of art. Children love bracelets too, so they try to make them with whatever materials are available to them. We can say that it was thanks to children’s imagination and the guidance of adults that such a direction of needlework as weaving bracelets from rubber bands appeared..
Features of weaving bracelets from elastic bands
The word “bracelet” itself comes from the French word bracelet, which means “wrist”. The bracelet is shaped like a closed ring. Jewelers make this jewelry from metals by casting or joining chain links, and children weave from threads, ribbons or elastic bands.
Weaving bracelets is similar to knitting with threads, only different elements can perform the function of knitting needles: pencils, forks, slingshot, looms, or even your own fingers. Weaving materials are alternated according to colors or other characteristics. If the bracelet is intended for a boy, then the classic style of weaving and blue, black or white materials are often used. A hand-made bracelet will be a good gift for a friend or girlfriend, so do not spare your time and try to master the basics of weaving.
 A DIY bracelet will be a good gift
Method number 1. Iris on the fingers
Fishtail is the easiest way to weave elastic bracelets. It is not necessary to buy whole sets of LoomBands for this, since it will be enough to purchase only elastic bands and take a crochet hook.
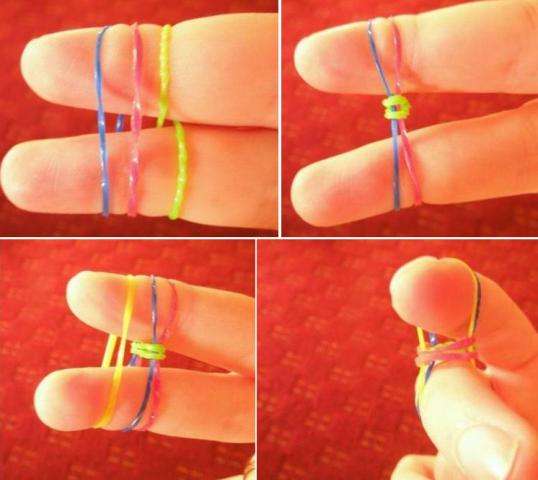 Weaving method with elastic bands: irises on the fingers
To weave a fishtail you will have to spend about 60 elastic bands, it all depends on the width of the wrist. If you are right-handed, pull the rubber bands over your left hand, middle and index fingers. First, one elastic band is twisted by a figure eight and so is put on two fingers. After that, two more elastic bands are worn on top without twisting..
 Finish the weaving by putting on the hook fastener on the outer loops
Now you can grab the crochet hook and fold the bottom elastic over your fingers, or do the same with your free hand. Slip the elastic over two fingers again in the usual way, throw the lower one over the top. Repeat putting on and off the rubber bands until the piece is the right size for your hand. You can alternate the colors of the elastic bands in any order..
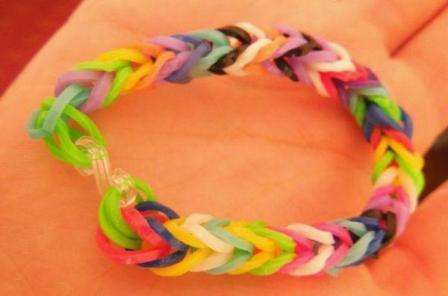
 Simple bracelet made of rubber bands on the fingers
To finish weaving, you need to throw the elastic bands all over one finger, there should be 4 rings on the finger.
Video: a method of weaving a bracelet from elastic bands without a machine on the fingers
Throw the bottom elastic over your finger so that there are two elastic bands, and put on the hook-clasp. The decoration is ready!
Method number 2. Weaving a rainbow bracelet on a fork
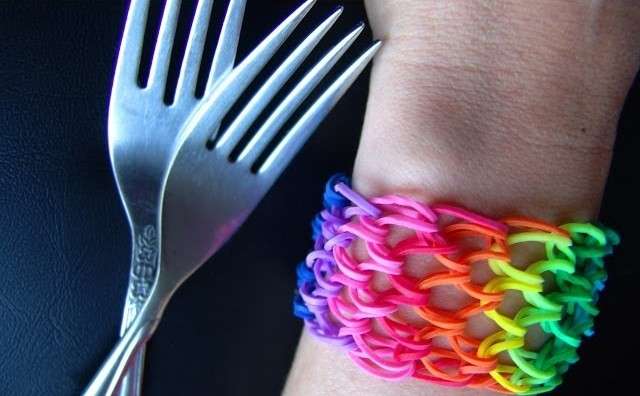
Every home has a fork, so Loom Bands have turned their cutlery into a loom. Even without special skills, you can master the basics of this weaving on a fork. You will need about 100-120 elastic bands and a plastic hook-fastener.
Method of weaving a bracelet from rubber bands on forks
Take an elastic band, twist it with a figure eight and put it on the middle teeth. Since the tines of the fork are narrow, you need to fold the elastic in half. Fold the next rubber bands in half and put them on the outer teeth of the fork without twisting. After that, the lower double loops are thrown over the teeth and the elastic bands are put on again on the sides. To finish weaving, you need to transfer the rubber bands from the side teeth to the middle ones, throw the lower loops over the top, and then put two double loops on the hook.
No. 3 Ways of weaving from rubber bands on a special machine
The Dragon Scale bracelet is very beautiful as it is much wider than the Fishtail bracelet. It is best done on a professional machine, on which the rows are removed or moved. Weaving begins with the fact that eights are put on elastic bands on eight columns, and then eights need to be put on between these columns.
Bracelet French braid made of elastic bands on a loom for beginners
Then, starting from the second column, begin to crochet the lower elastic bands and throw them over the columns. After that, pull the elastic bands onto the posts without twisting. The lower elastic bands are thrown over the upper ones, and then put on the elastic bands again without twisting.
Repeat braiding until the band of the bracelet reaches the desired size. When the bracelet is almost ready, you need to put on one elastic band on the outer four columns and throw loops over it from other columns.
Simple bracelet on the machine
To complete the weaving from the extreme column, you need to transfer the elastic to the second column, and throw the lower ones. Then, from the second column, transfer to the outer elastic bands. The same thing needs to be repeated on the other side. Two loops can be removed from the machine and put on a hook-fastener.
Method number 4. Weaving on a slingshot
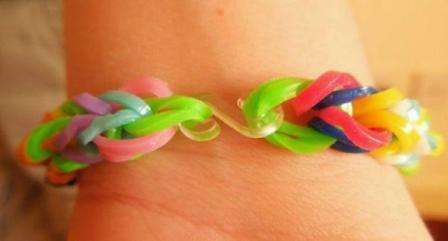
Do not think that only an elementary Fishtail bracelet can be made on a slingshot, you will even be able to weave the Sidewalk. To do this, take two elastic bands, twist them with an eight. After that, two elastic bands of a different color are taken and thrown on top without twisting.
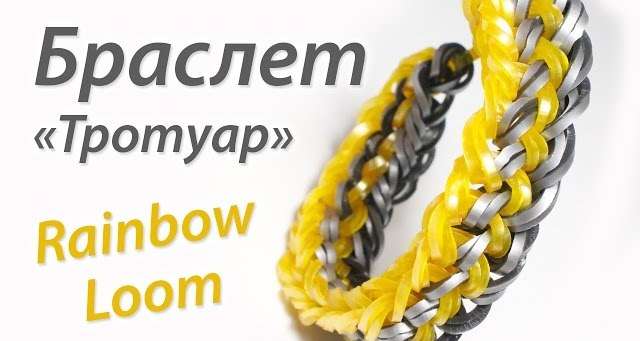 Weaving on a slingshot bracelet TROTOIRE
Unlike other weaving techniques, not two elastic bands are thrown off the post into the Sidewalk, but one. Then two rubber bands are put on again on the slingshot and two pairs of rubber bands are already thrown off the other column.
How to weave bracelets from elastic bands, the TROTOIRE method
Put on two elastic bands again, throw off one bottom, then put on two elastic bands and throw off two from the other column. There is nothing difficult in weaving, continue until the size of the bracelet is suitable. To complete the work from one column, we throw off the elastic bands on the other and put on a hook.
Method number 5. How to make a pencil bracelet
Rainbow Loom rubber bands became so popular that they began to use not only forks, fingers and looms, but also ordinary pencils for weaving. Try to weave bracelets using the Bicycle Chain technique on pencils. Between two new identical pencils, a square or rectangular rubber band is clamped and wrapped with tape. The first elastic band needs to be twisted with an eight and put on pencils. After that, another elastic band is twisted in half and put on one pencil.
Weaving a bracelet on pencils
Now insert the hook from above, pry the elastic band twisted in an eight, and transfer it to another pencil. After that, twist the elastic band on one pencil twice, thread the hook again from above and pry on the two lower elastic bands, pulling them through the upper ones. Throw the elastic bands to another column. Repeat winding the elastic bands on the posts one by one and throw them over as in previous times. The result is a Bicycle chain. The bracelet, as in all previous cases, is hooked and removed from the pencils – stoblikov.
After watching a step-by-step video on how to make do-it-yourself rubber bracelets, you will see that this is quite simple to do. Elastic bracelets are a creative accessory and good leisure for children and adults.